I am a consummate DIY re-creator…if I see something I want, but cannot afford it, I just whip up my own version. When I first saw this image of antique wooden sock forms used as a stand in for stockings in Country Living Magazine, I knew that I would be re-creating those for my mantle last year. I loved this project so much I thought I would share it with you this year.
As I always do, I start my research by Googling wooden stockings and quickly found out they are really antique stocking stretchers. I printed a few of the images I found to use as a guide for drawing the shapes. Then I needed to gather my supplies. I think my Wooden Stockings re-creation is close to perfect…and so very affordable…see how I did it below.
DIY Vintage Wooden Stockings Tutorial
This project will be created with Elmer’s foam board because it cuts like butter with a sharp X-ACTO® Designer Series knife. I thought this foam material would make a very convincing replica of the wooden sock forms used in the Country Living photograph. It would be light weight plus sturdy and rigid enough to look like the real thing.
My decorating theme is Midnight Clear. I am going to make my stockings match my blue and silver decor by doing a simple pickling and whitewashed finish on them. Pickling or whitewashing techniques simply serve to lighten the color of the wood. Both allow you to brighten wood without hiding the grain pattern. I will be re-creating a grain pattern on the foam with Painters acrylic paint markers and some blue and white acrylic paint.
Items Needed:
- Elmer’s foam board
- Elmer’s foam board
- Painters acrylic paint markers
- X-ACTO Basic Shapes template
- CraftBond™ Flexible Dual Tip Glue Pen
- CraftBond™ Foam Mounting Tape
Directions:
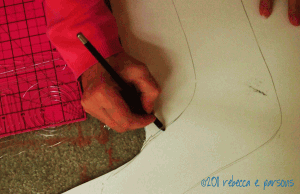
- First, I sketched the stocking shapes on the Elmer’s foam board. I did not obsess about being perfect here…I just looked at the picture above and went for it. If you are a perfectionist, use some of your socks or panty hose as a pattern and trace!
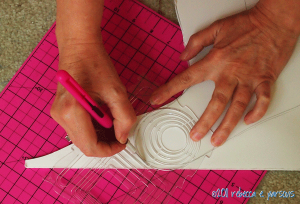
- I cut them out with my new X-ACTO Designer Series Retractable Knife…did I mention I love this craft knife? I followed X-ACTO Basic Shapes templates for the curves. It made it really easy to get clean lines.
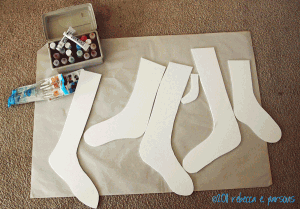
- I established some grain lines with a blue Painters Bright acrylic paint marker. I did not obsess about the grain either, as nature is not perfect. So I just drew what I thought looked like grain. I even put a few knots in for good measure.
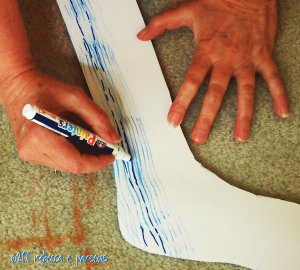
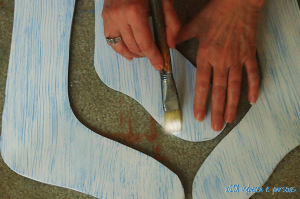
- I brushed some watery blue acrylic paint along the established grain lines to mimic the grain of the wood. I allowed this to dry a few minutes.

- I dry brushed some white acrylic paint randomly over the surface to dull the blue back and give it a pickled appearance.
- I threaded a needle with strong clear jewelry thread. You could use fishing line also. I ran it in and out of the top of the stocking and tied it off to create the hanger. I used CraftBond Flexible Dual Tip Glue Pen to place dot of glue on the back to secure the thread to the back of the stocking. I also wanted to keep it in place so it didn’t tear the foam board.
- I mounted them under my mantle with CraftBond Foam Mounting Tape.
- Here is the result…
More DIY Christmas Decor Ideas
DIY Christmas Trees Made Using Old Sweaters


Now that’s how you get it done! Very nice decor, I love how you took something you liked from a magazine and made it your own! Very creative!
Ok, that’s a really cute idea! If I had a mantle, much less a fireplace, I’d so do this! LOL
Cute idea. . Looks just like the one in the magazine!
I’m impressed! Looks so much like the magazine. Really neat!!
I agree with Lois, I’m actually impressed by how it turned out, it looks amazing 🙂
I LOVE the Christmas tree in the nook. I see you have 2. I would add a white tree to that side! The whole thing is very pretty and looks cozy.