I love books and I love to make books, especially journals and vacation books. I have been making them for years and have been fortunate enough to take classes with some of the best book makers and book binders in the world. Dan Essig taught me coptic binding, sculptural and wooden books, and Dea Sasso taught me how to make a case bound book. The Letterist, Eliza Holliday, taught me how to make paste paper. And so many others have taught me paper marbling, Japanese stab bindings, triple chain stitch bindings, and so much more. Yes, I love book making.

Off to BlogHER and International Food Bloggers Conference
I am traveling throughout August to grow as a blogger and a foodie. Next week I am off to the BlogHER conference in New York City. Then my niece is getting married in West Virginia the following weekend, so I am taking a little time for vacation activities. I am home for a few days and then I am off to the International Food Bloggers Conference in Portland, OR. That’s a lot of travel…a lot of pictures…and a lot of memories. I am going to show you how I keep track of those in the neatest way…you will love it. And it is super easy to do.

Quick and Easy Travel Scrapbook
This book fits in your carry on and purse and gives you a place to collect ticket stubs, small paper items, wine labels, etc. from your travels. There will be pages to write on, pockets to hold treasures, and places to sketch if you like. There are a lot of steps, but it is really easy…plus it is no-sew!!!. Kids can make their own. Once you do this, you will want to make one for each journey!!!
I had a magazine from NYC that I used for the paper in my example. Usually I use a road map or even scrapbook paper. However, you could use wrapping paper, handmade paper or even a piece of your art. You could collage the front (I often do this when I am traveling and have a special moment I want to remember). Keep supplies handy even as you travel. Just take your travel scrapbook and an Elmer’s Craft Bond Glue Stick along in a plastic bag. It is small and convenient.
I made these as I traveled Europe when I was studying art in France and Italy. I have several of these travel scrapbooks that I treasure. My kids made them too, so this has become a family tradition. Before leaving for a trip we have a special tradition of making books together. Sometimes we do it on the first night of the trip. It is a great bonding experience even for the smallest traveler!!!
HIMself and I went to Walmart to shop. I am learning to check in with foursquare or Jengit. I tried to download Jengit but it did not work for some reason so I used foursquare. I even posted a photo via Instagram of the Elmer’s display about the 1st Day of School app. You know I love my Elmer’s products and am a proud member of Elmer’s Glue Crew #GluenGlitter.

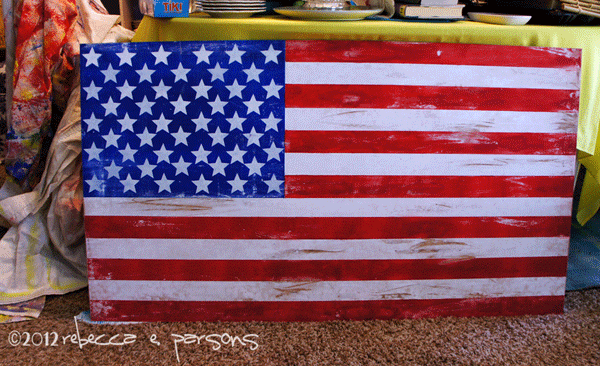
It was a beautiful day. I snapped this photo of the flag billowing in the breeze as I left Walmart. Isn’t it gorgeous?

The Step-by-Step Tutorial
I am going to be using few technical terms in this simple tutorial…so I have included this diagram below:


Elmer’s cardboard Tri-fold Display Board from Walmart

Heavy paper – I used a sketch pad
Small Notebook with sewn binding
Old Map or decorative paper and coordinating paper
Elmer’s Craft Bond Glue Stick
Painter’s Pens
Duct Tape – I used a fancy patterned one
Scrunci or elastic ponytail holder
Craft Knife
Old credit card
Scissors
Paper Cutter
Embellishments and stickers (optional)
Directions (click on photos for larger view)
- Cut Elmer’s Tri-fold display board about 1/4″ larger than your notebook. Cut 2 pieces…this will be your front and back. Set aside.


- Measure and cut 2 pieces from the map or decorative paper, 2″ larger than the cardboard. This will cover the front and back of the book.


- Measure and cut 2 pieces of coordinating paper, slightly smaller than the size of the cardboard. This will be the inside of the cover.

- Lay the map paper for the front of the book face down on a protected surface. Center a piece of cardboard on top and draw lightly around the edges of the board with pencil.

- Spread Elmer’s Craft Bond Glue in the area you just drew extending about 1/8″ over the pencil lines.

- Place front cover cardboard inside the lines. Turn over and press the paper from the center to the edges with a credit card. You are trying to make this as smooth as possible. Move quickly as glue dries pretty fast.

- Flip over and fold the edges toward the center. There should not be glue on the flap yet. Just fold to make them wrap edges. Glue the long sides (left and right sides) in place. Smooth with credit card.

- Now fold the top flap toward the center. Hold in place and take the right edge and fold back on itself to form a triangle (see illustration below). Crease. This creates a mitered edge. Trim along the fold from the edge to almost the corner. Remove the bottom piece that is attached to the side flap…it just gets in the way as you glue. Repeat with the remaining three corners, top and bottom.


- Repeat steps 4-8 with back cover.

- Decorate the covers with Painter’s Pens, stickers, etc. Set aside for the paint to dry as you continue.

- Glue coordinating paper over the inside of the covers making sure it is centered and evenly spaced from edges.

- Fold about 2 – 3″ from the bottom edge of a piece of the sketch pad paper (see illustration below). Repeat this with 3 additional pieces. Cut the 4 pieces of sketch pad paper a little larger than the opened notebook. These will wrap the notebook.


- Now assemble in this order…the notebook, 4 pieces of folded sketchbook paper. Trim if necessary.

- Place front and back covers over the outside paper. Make any adjustments now.

- Tear a piece of Duct Tape twice the length plus 1″ of the cover’s tall side. Lay the tape sticky side up on the surface and place the front and back covers on the tape across from each other. Leave about 1/4″ in middle open. (see diagram) Wrap the tape around the covers overlapping the end of the tape. Press over the tape a few times to make sure it is secure.

- Place a final piece over the center of the inside spine to reinforce it.

- Fit the inside pages in the cover. Close and make sure it fits. You can still trim anything that hangs out at this point.

- Wrap the scrunci around all the layer of paper and cover to secure all the pages together. If it is too big, just wrap it around twice.

- I always include a giant paper clip just in case I need extra hold.

- You can add other embellishments to your hearts content now. I usually wait to do this while on my trip..but you can play with it until you are happy!!


From Old Travel Journals
Below you can see one of the pocket pages of a completed travel scrapbook from BlogHER 11.

This next shot shows some of the things I do in the book. If I have a great wine with great friends, I save the label and glue it into the book. I also do some sketching of places I want to remember like the Imagine fountain in NYC Central Park. It is across the street from the Dakota where John Lennon lived and died.

Check back in a couple of weeks and I will show you what I gathered at BlogHER 12 in NYC!!!
Some of the places you can find Elmer’s…and great projects…online:
Follow Elmer’s on Twitter
Follow Glue n Glitter on Twitter
LIKE Elmer’s on Facebook
LIKE Elmer’s Craft It on Facebook
LIKE Glue n Glitter on Facebook


I am blown away. Please don’t hate me if I copy you and make one for myself for BlogHer. This is perfect!
Love this post girl! WoW~are you going to to Blogher?
Carolyn…that’s what I wanted people to do…please make your own…you will be thrilled you did!!!
I am so going to BlogHER…hope you will be there!!!
This is one amazing project. You always blow me away with your amazing talent. Have a great time at Blogher.
I love that! I always save lots of goodies on my trips and this book is so cute! What a fun keepsake. Have a great time at BlogHer.