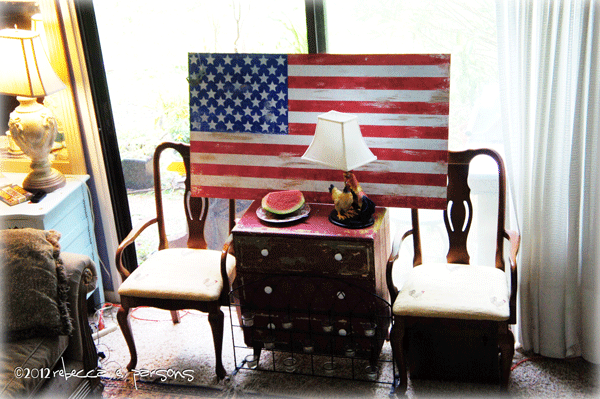
Paint your own Rustic Painted American Flag with this simple Step-by-Step Tutorial using paint pens. It is a Pottery Barn Knock Off project. I love to browse the high end stores like Pottery Barn and West Elm for decorating ideas I can knock off. When I came across this large Painted American Flag, I knew it would be my next {Luxe 4 Less} or designer looks for less project. Memorial Day marks the start of summer festivities in our home. We remember those brave men and women who have defended our country by flying and honoring the red, white and blue.
Now this weathered wooden flag is substantial – 50″ wide x 27″ high. The distressed painted finish gives the piece a rustic look which is sealed with polyurethane for moisture resistance. I dug into my faux finishing bag of tricks and created my version in the exact same dimensions and as close to the actual finish as I could make it.
Rustic Painted American Flag How-to
My first dilemma was to decide what surface to use. I thought about Elmer’s foam board which I love, but it was not quite large enough plus if I was going to create such a large artwork, I wanted it to be made of something I could keep forever. So I headed to Lowe’s for some surface inspiration. I looked at plywood and felt it was too heavy for what I wanted. I decided to make it on the back of a piece of wood paneling. It cost under $10 and they make two cuts for free. Just what I needed. It is wood and light weight so I can easily hang it and move it, yet it is sturdy. Perfect.
Next I headed to Walmart to buy the supplies I would need to accomplish my art. I bought white spray paint to create the background (see hints below). I bought some of the new single Painters Pens (Painters Opaque Paint Markers) for the detail work in red, white and blue. Elmer’s now offers Single Painters for $1.97 each. This makes it less expensive than buying an entire pack of paint pens. You can get the exact colors you need in the amount you need. From the look of the paint pen display below, several people like this option. Great idea Elmer’s. I also found an X-ACTO template with stars in several sizes that will be perfect as a stencil with the white Paint Pen. And I bought a cheap candle to create the distressed areas. See my entire shopping trip in a slide show here.
 So yesterday {art/craft day) my little island was under a tropical storm warning. After I painted the blue area, it started sprinkling. By the time I had the stripes laid out the storm had moved ashore and I had to move the project inside as the wind and rain pounded outside. The entire project took me about 7 hours…the stars just about pushed me to the edge of insanity and took about 4 hours to get the placement correct. I needed a flag stencil for sure!!! But I persevered with beautiful results. I now have a showpiece for my family to treasure for generations to come.
{Step-by-Step Tutorial}
This distressed painted finish is an easy and simple way to achieve a rustic look on any wooden surface. I have used it for years on my Ghosts of Furniture Past painted furniture. The technique adds character and style to any piece along with instant age…paint worn off in areas that have been rubbed repeatedly or nicked by the many times it has been moved over the years. It indicates that the piece was well-worn and well-loved for generations.
The big secret is using wax under the paint. If you want paint to show through the distressed areas, as if the piece has been painted many times, you’ll need to paint two or more colors. If you want the rubbed-off areas to reveal bare wood, the technique requires only one color of paint. In my flag I will use both techniques because I want some areas of raw wood showing and some areas where the base color (white) shows through.
I will also stain the piece afterward to mute the bright colors and age the flag. To retain the integrity of my artwork and protect it, I will spray several coats of clear polyurethane over the finished project. I use a water-based polyurethane that won’t yellow over time.
materials
Wood surface (cheap paneling) 50″ X 28″
Candle
White satin spray paint
Sandpaper
Cotton cloth to remove sanding dust
Red, White and Blue Single Painters Paint Pens (Painters Opaque Paint Markers)
Red, blue acrylic (indoors) or exterior latex (outdoors)
Elmer’s Star template
Brown acrylic paint
Spray Polyurethane – water-based
technique
Click on the photos to see detailed view.
- Rub candle wax into the wood in the areas you want to distress. Paint will not stick to wax, ever. So this technique is reserved for wood surfaces…not walls.

- Spray surface with white spray paint. Let dry.
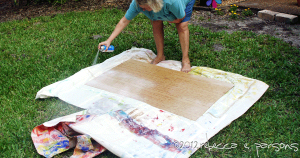
- Sand back areas to reveal the raw wood. Don’t get too carried away and remove all the white paint. Remove sanding dust with a soft cloth.

- Rub a few areas (3) with candle wax. These areas will reveal the white paint when sanded back.
- Twist the plastic top off the Painters Pen. See how they tell you where to twist? Love that!!!
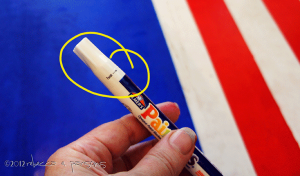
- To activate the pen, shake for a minute or so and push tip against a piece of paper until you see the paint coming into the tip. This may take several seconds. Be patient and keep pressing down firmly.

- Measure and draw the blue star field background with the blue Painters Pen. The blue area on my flag is 20″ W and 15″ D.

- Tape off the area. I use paper tape. The great thing about the Painters Pen is that you can tape right over the line as it dries quickly. That way, if there is any bleeding of the paint, it goes onto the pen line. HINT: I usually roll from the tape onto the surface…not toward the tape. Paint area with blue acrylic or latex. Let dry.
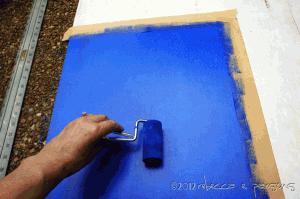
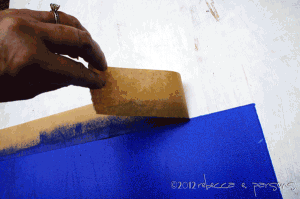
- HINT: Peel the tape carefully immediately after painting. don’t wait until the paint is dry. Pull tape back over itself as in the photo.
- While the blue area is drying, measure and draw the 7 red stripes with the red Painters Pen. My stripes are 2.15″ D. Remember that the top and bottom stripes are red and the 4th stripe down from the top of the flag is the same level as the bottom of the blue field. Take your time and measure carefully before you commit. HINT: I make a red X with the Painters Pen in every stripe that will be painted red. That way I know where the tape and paint will go.

- Tape along the edges of the white stripes. Burnish the edges of the tape with the back of a spoon. Paint with red stripes acrylic or latex. HINT: Do not push too hard on roller so the paint won’t seep under. Let dry.
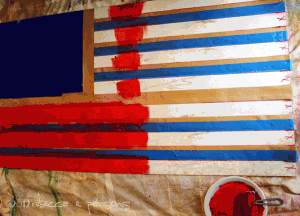
- Make any touch-ups after paint is dry. The Painters Pens were awesome tools for this job. They make it really easy!!!

- Half way through project…so far, so good!!!
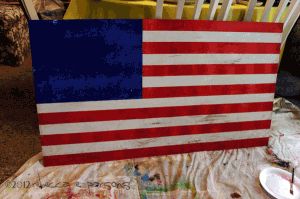
- Stars: UGHHH!!! This was the most difficult part of the whole flag. It took me about 3 hours!!! Stars must be placed just as they are on the current flag. It is not easy to figure placement…there is a lot of math involved. I finally found it was best to work from the middle row out. The only hint I can offer is that the center of my stars are about 3.5″ apart. Let dry.
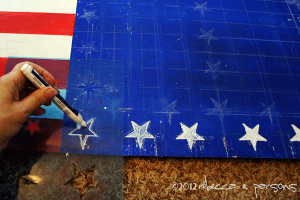
- Sand back random areas of the flag to reveal the white paint. Sand over previously sanded areas to reveal the wood if you like. Remove sanding dust with a soft cloth.

- Make sure that all the edges are finished with the Painters Pens…so easy.

- Aging the flag: Dilute the brown acrylic paint with water to consistency of ink. Brush it on and rub it back immediately with a soft cloth. Rub some areas more than others. The idea is to give it age and history.

- Spray with two coats of Polyurethane over flag. Spray one coat horizontally and one coat vertically allowing first coat to dry before second coat.
at night…
This is a look outside after the worst of the storm…

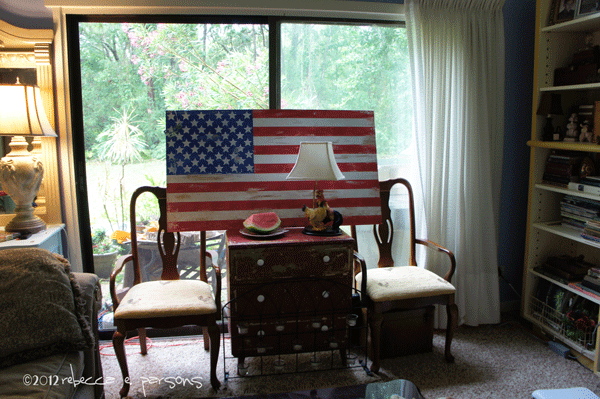




That turned out great! What a keeper. I have got to try these paint pens – I have heard so many good things about them.
This is the most beautiful flag!! You are so talented!!
That is such a great tutorial! I am loving the Elmer’s Paint Pens. Drop by & link up your tutorial right here where I have a link-up / blog hop going on: http://www.dearcreatives.com/community/
I just might have to try to make one for the 4th of July!
It looks really really good! Looks better than pottery barn!!
Wonderful job. Your hard work really paid off!
Rebecca, it’s fabulous! Love it, love it, love it! I can’t wait to try out some of your distressing and aging techniques. Thanks so much for sharing!
You are such an inspiration! I too found that Painters Pens are such a perfect way to do touch-ups when painting lines on walls, I can never get the painters tape just write and always have bleeds.
I saw that flag in the Pottery Barn mag and I was wondering if I could replicate it because I just loved it so much. Definitely don’t think mine would have come out as perfect as yours looks. Maybe now that I have your tutorial, I’ll give it a try.
Thanks you all…this was such a fun project. I loved the Painters Pens…they make the job painless!!!
You did such a good job!!!
Those stars would have driven me batty! My Virgo always kicks in when I’m working on things like that and I have to take many breaks to keep from pulling my hair out. 🙂
It was all worth it, though…it looks amazing!
Wow, Rebecca, that looks great! I wish I was crafty enough to do something like that. Of course, you list out such helpful instructions, maybe I *can* try it (attempting to boost my confidence for DIY projects…)
Thanks for sharing!
~Cheryl
(@the_bak)
Love how your project turned out! I would love to make my own flag. Thanks for the step-by-step info.
All that hard work definitely payed off! I am sure it will be enjoyed for years to come.
Wow… that came out awesome! Great Job!
I don’t know if I would have the patience for that many steps!
Wow! All of your hard work really paid off! What a fantastic project!
Beautiful! I love the distressed look! A great point, pardon the pun, about the ease of touch ups with Painter’s Pens!
Hi visted a high end furniture store at mall today, fell in love w/flag on canvas. Price way beyond crazy! By accident i found your flag wow i am excited to start soon . Thank you for your step by step info.
Looks great – especially the distressed/aged look…
How big are the stars?