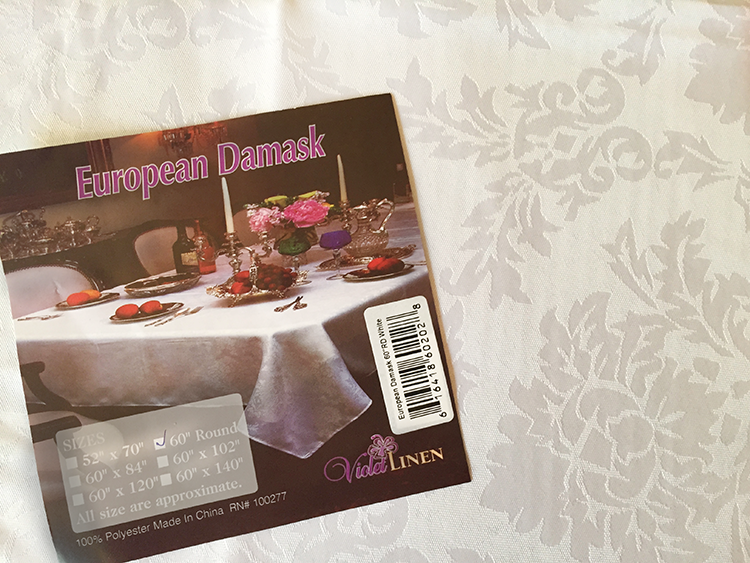
I am participating in The Great Craft Swap with Wayfair Homemakers. Wayfair.com sent me a white European Damask 60″ round tablecloth byViolet Linen to create with. And I was compensated for my craft time. How awesome is that? Plus, I received the work of another Homemaker’s hands.

Our Great Craft Swap

Here is my craft for Debbie Westbrooks. I turned a tablecloth into a wallhanging. Below is the tutorial and step-by-step photos.
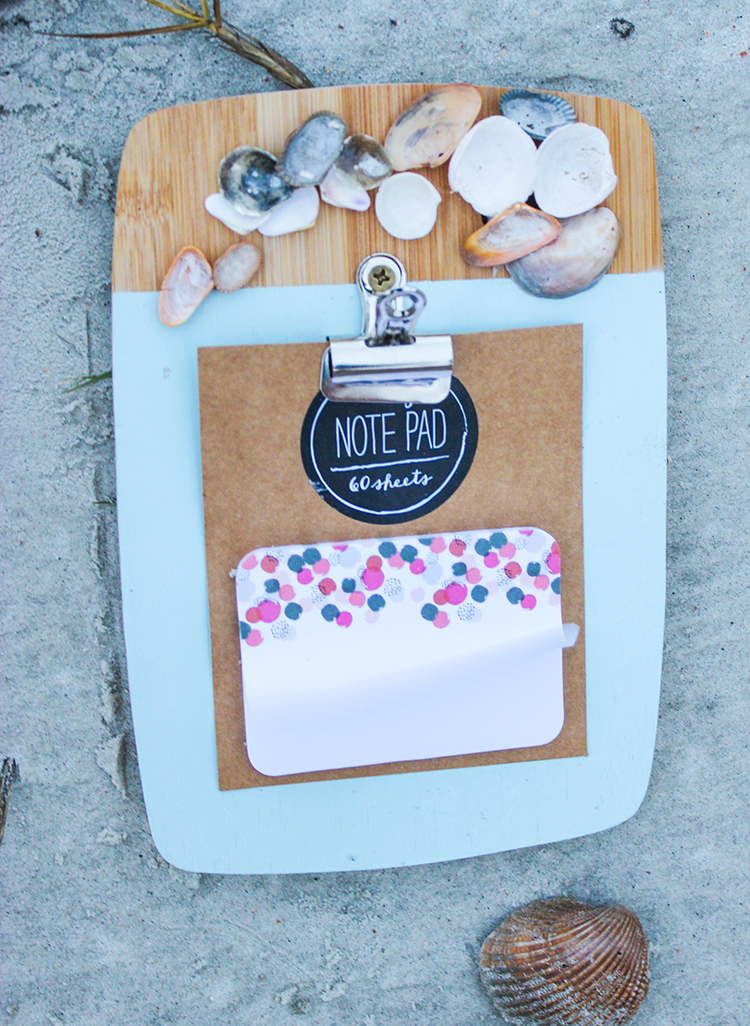
Debbie turned these bamboo cutting boards into something beachy for me. I love the tiny details like the stenciled background.
My Creativity Unleashed 2015

I have been returning to my art this summer. I work very hard at my job running an online school for 4000+ professional bloggers. To find balance, I needed to reconnect to my creative side, so I declared the last six months of the year – Creativity Unleashed 2015. Joining The Great Craft Swap was a perfect fit. I love creating something unique for someone else. And I believe this artwork fits the bill.
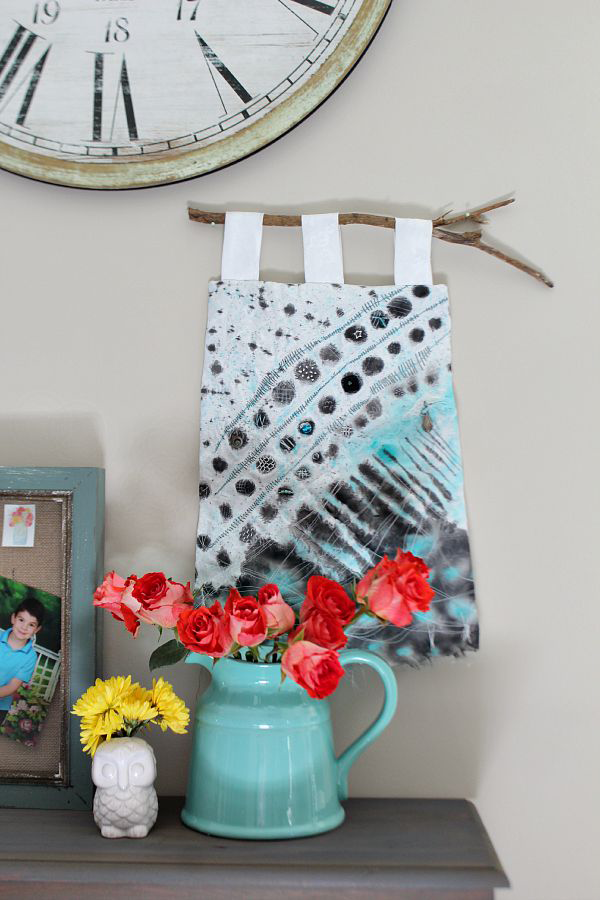
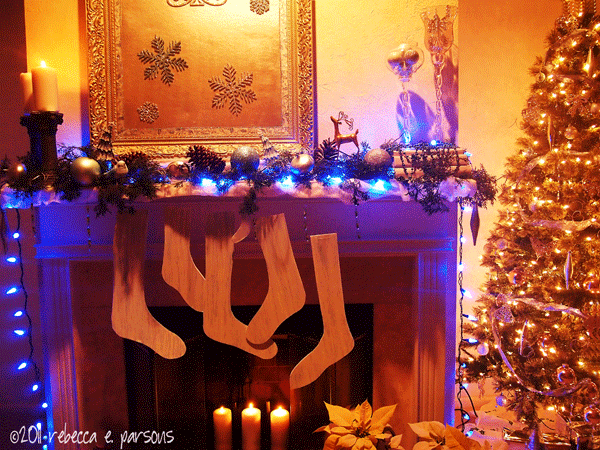
My first thought was to make something other than a tablecloth for the very talented Wayfair Homemaker. Masterful DIYer Debbie Westbrooks, of Refresh Restyle, has a lovely home decorated in traditional style. She uses a black and white pallet with a few touches of red. Of late she has also added some turquoise bits and pieces. Her skill and style jumps off the pages of her beautiful blog. So coming up with the perfect project stretched me in many ways. This is how she displayed my artwork!!!
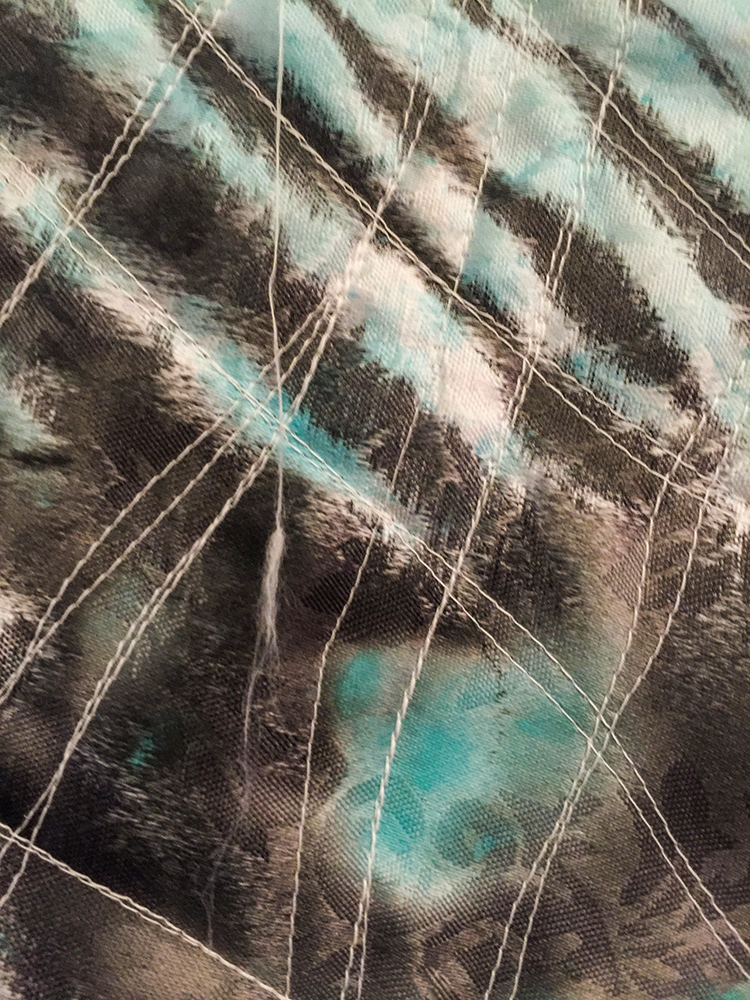
First, I am not a black and white artist. I love color–vivid luscious hues. I also love texture and layers and layers of pattern. So I decided to create a mixed media fiber artwork with the damask tablecloth as a background surface and add hand and machine stitches, thread, paint and some hand beading. But first, let me show you what Debbie made for me:
Details of my bamboo office organization set from Debbie:
She used a three-piece bamboo cutting board set from Wayfair as the surface for her creativity. Click on the photos to see a larger version. You can visit Refresh Restyle to see her tutorial. I took the pieces out to the beach to photograph.
 The chalkboard has aqua sea glass. I can never have enough of that in my home. I love how she used a drawer pull upside-down for a chalk holder. She left some of the bamboo showing on each piece.
 The smallest piece is a post-it not holder. This beauty rests on my desk and makes me smile every time I see it.
 The SEA To-Do List holder is a fresh addition to my home organization. The painted section has a tone-on-tone stencil that I could not capture in a photo.
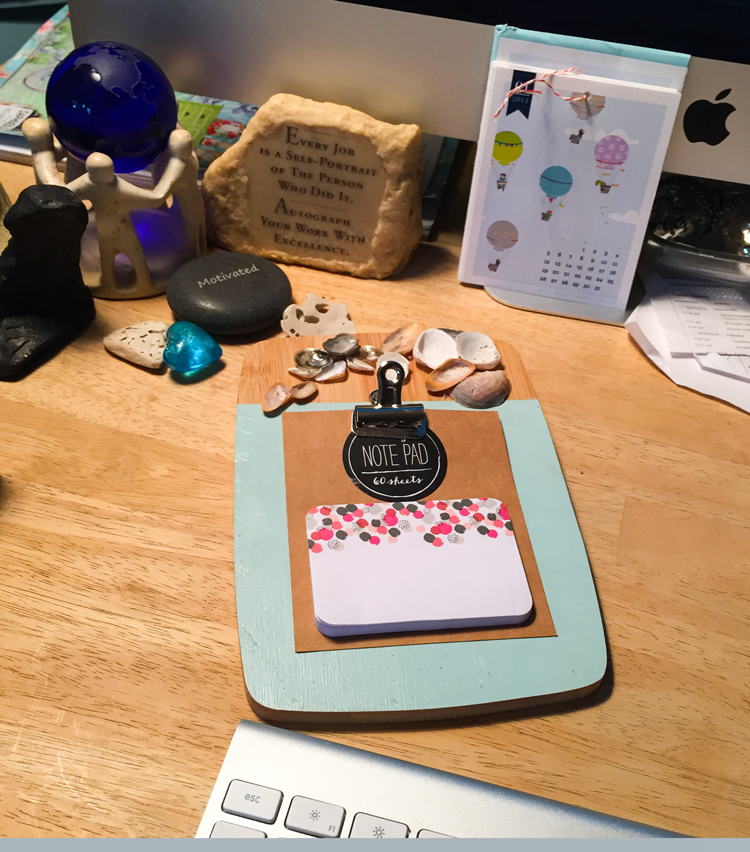
The note pad on my desk fits right in among my shells and computer.
The Design Process
The damask was a starting point for my art. I sketched several ideas before settling on one amazing piece. I made this decision because I had limited time. I received the tablecloth on September 2nd and had to have it in the mail no later than September 8th. Lucky for me, my employer gave us an extra day for the Labor Day weekend. So I had four days to create a masterpiece. HIMself was away, so I had a creative retreat weekend.
Tutorial
Materials
1 – Violet Linen European Damask 60″ round tablecloth washed/ironed
Golden Acrylic Paint – Carbon Black, Cobalt Teal
Artist Brushes
Lightweight Quilt Batting
White Poly Thread for sewing machine
Assorted Embroidery Threads
Assorted Beads and Charms
Interesting Stick
Step-by-Step Directions
- Wash and iron the tablecloth.
- Painting the Fabric. The tablecloth is 100% polyester with a tight weave that frayed easily. I tested fabric markers, paint pens and acrylic paints on a scrap of the fabric before painting.
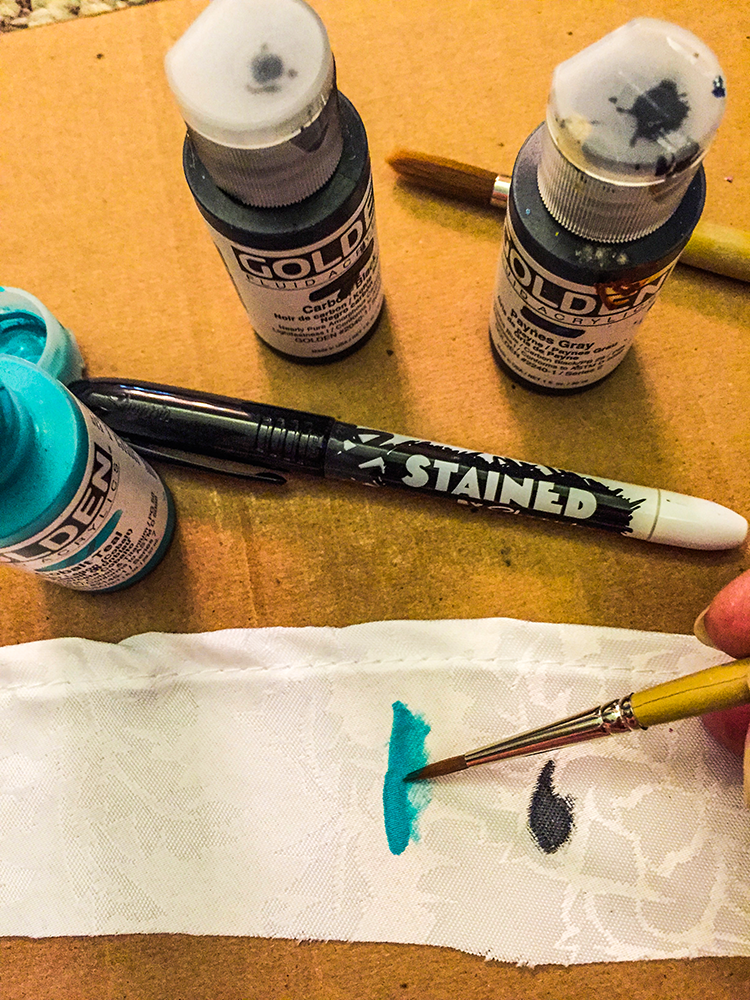
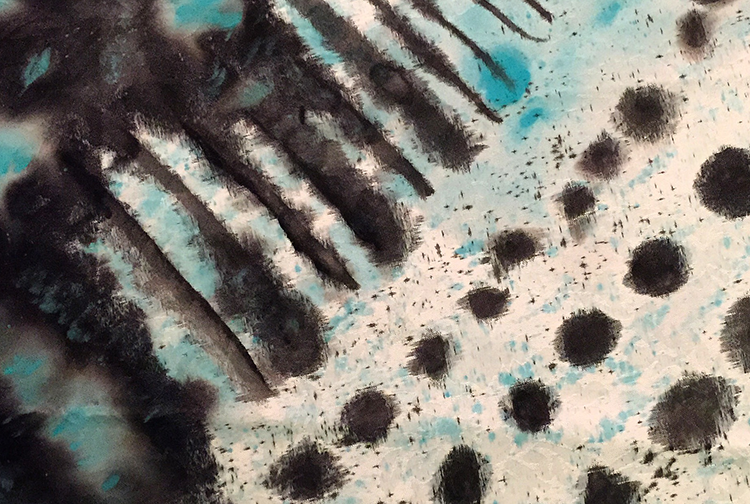
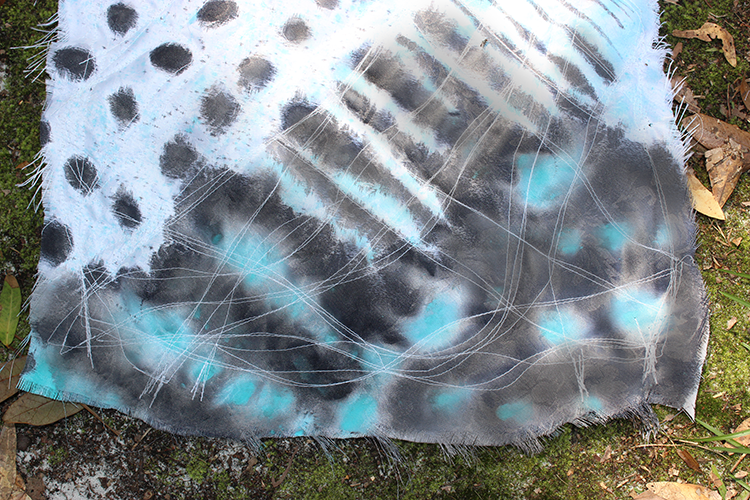
The paint worked best and kept the fabric from fraying. I allowed the paint to create the pattern. I laid down stripes of watered down black acrylic. It was more like the consistency of ink. I wanted to stain the fabric, not have paint sit on top of it. It spread as I painted to make interesting designs with the damask pattern. I dropped water in areas and that created shades of gray. Then I started making dots of watery paint. It traveled along the warp and weft, creating interesting shapes. Next, I spattered the black paint with my brush. I repeated these steps with the teal. I allowed the fabric to dry overnight.
 This is what my hands looked like after painting…
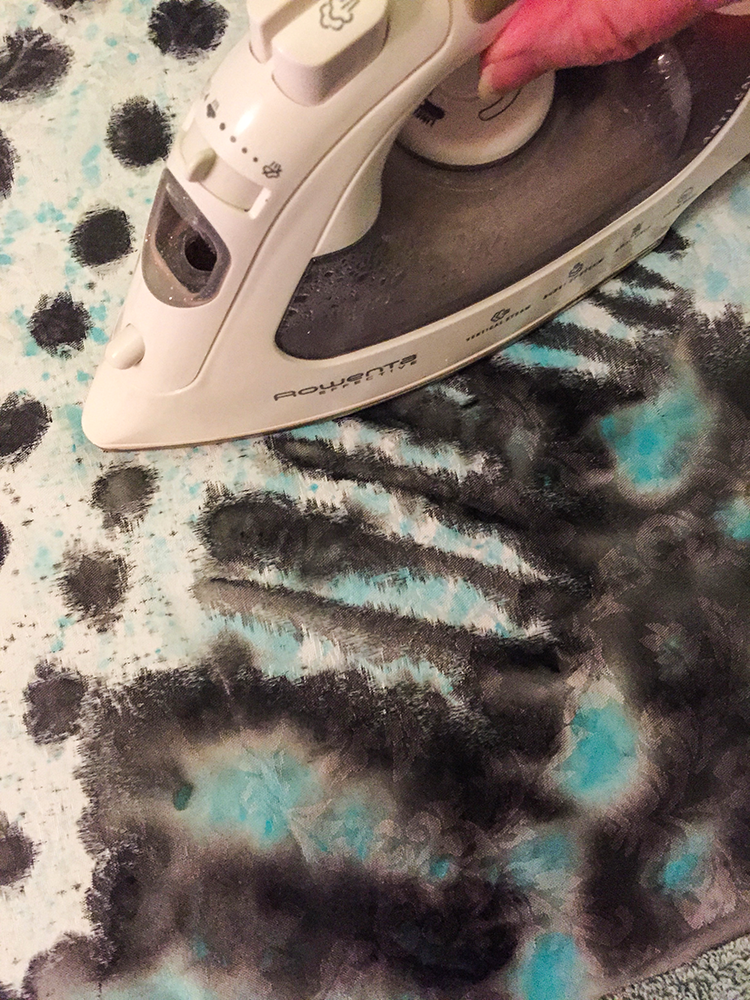
 - Setting the Paint. I ironed the back of the fabric to set the paint. Since the pain was so wattery, it stained the cloth. If you use full-strength paint, and it rests on top of the fabric, you will need to use a pressing cloth to iron. You can see the patterns the paint created in this image. The damask of the tablecloth shows through creating interest.
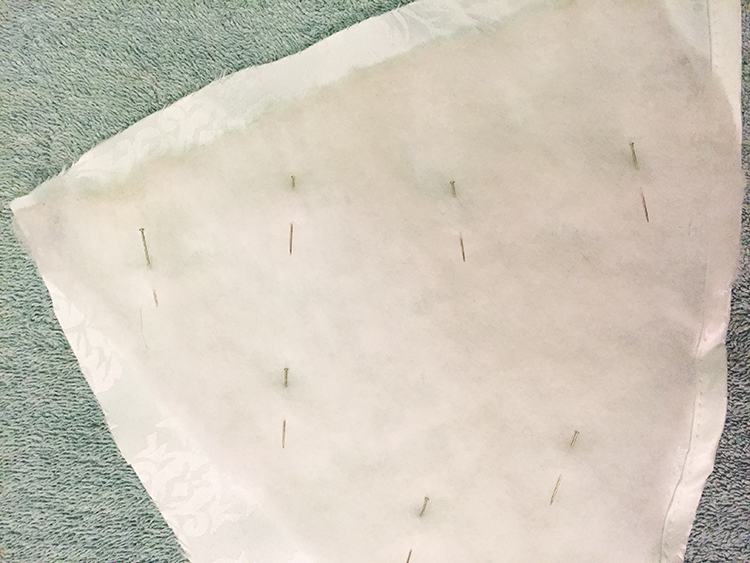
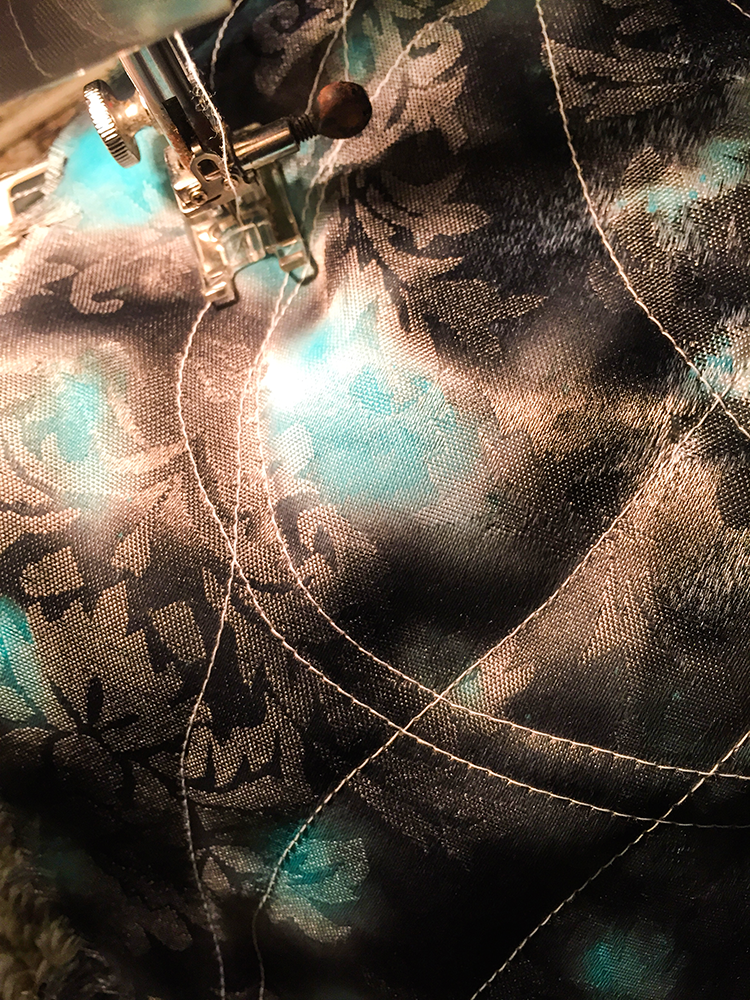
- Batting and Free Motion Stitching. It was time to add texture. I cut a piece of batting to fit the fabric, leaving abut 1″ on all sides.
 I pin basted the batting to the painted piece so it would not shift during the free-motion stitching. This is the test piece. Yes, I always test before going to the art!!
I then let my sewing machine wander over the painted fabric randomly. I kept the feed dogs up for this process, lengthened the stitch length, and covered the surface at will.
 This is the result:
- Hand Stitching. It was time to add some hand stitching details. I wanted to create rivers of stitches across the piece around the dots of paint. I did three rows of long, vertical straight stitches with black thread across the piece. I followed open spaces in the free motion design. Then I connected these with teal thread horizontally in a running stitch from thread to thread. You can feel the texture of the piece when you ran your hand over it.
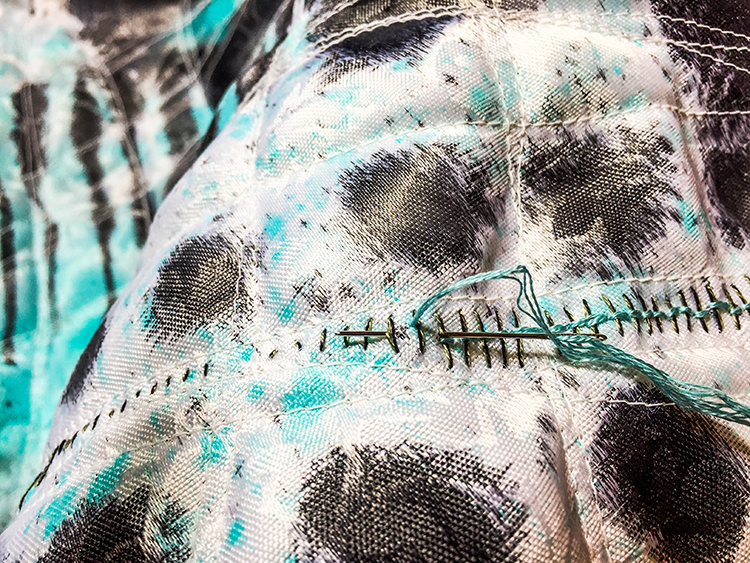
- Mark Making. Next, I created marks on the dots with a white opaque pen. I did random designs on several, but not all of, the dots.

- Hand Embroidery. I placed embroidery stitches over some of the marks. I did French knots, running stitches and a modified blanket stitch. This added even more texture to the piece.
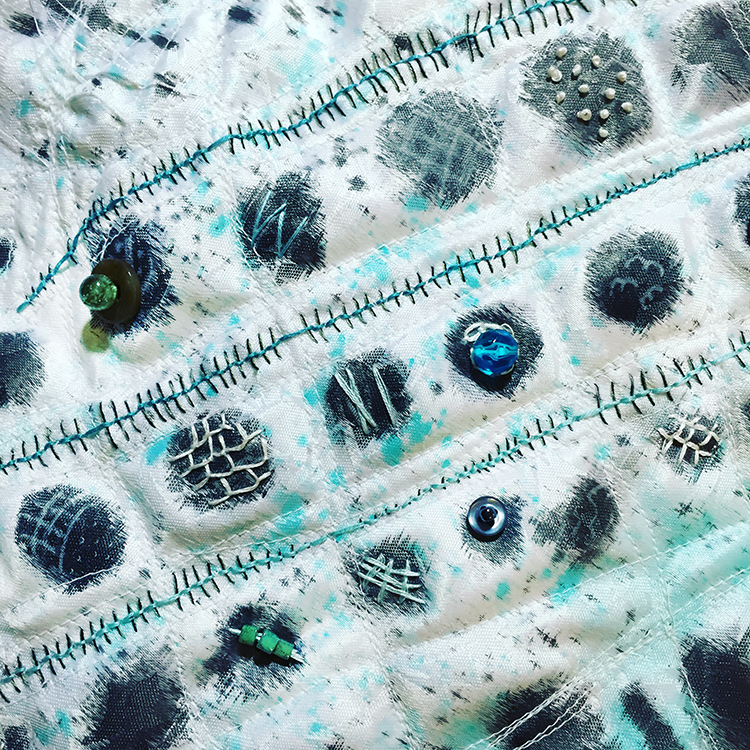
- Embellishing. I wanted a pop of sparkle in a few spots. I added buttons and beads over a few of the dots. I had a pile of threads from the fabric fraying that were soft and formed a nice pattern. I sewed them over the spot where several of the free motion stitches met. I added a sterling silver charm and bead to create a focal point. The color of this photo is a little off, but you can see the details.
- Backing and Tabs. I cut a piece of fabric from the tablecloth the size of the finished piece. You can see how uneven the edges are. I like this undulation and decided to leave it. I made three tabs of fabric on the top for hanging. I placed the tabs evenly across the top of the painted piece, folded them in half and pinned them in place. The top, closed edge of the tabs were facing the bottom of the piece. The rough edges ran alon the top of the piece.
 I hemmed the bottom of the backing piece. I turned the hem under twice, ironed it and pinned it before sewing.
 Then I created a fabric sandwich by placing the art piece face up. The tabs were pinned to the right side of the art. Then the backing fabric was laid face down over this.
 I pinned basted the pieces together so they would not shift during sewing. I sewed along the sides and top edge. I turned the piece right side out and pressed the edges.
 - Adding the Hanger. I found a beautiful stick on one of my walks this week. I used it to hold the art for hanging. I ran it through the tabs.
“Wandering Feather” Wallhanging

I named this piece “Wandering Feather.” It has a dangling feather on the surface created from some of the threads of the damask. You can see the detail below.


Rebecca,
Thank you so much! I love my new artwork, you are amazing and you can send me any thing any time!
XO,
Debbie