My pantry was a hot mess. This Wayfair Homemaker is on a mission to simplify and organize in 2015. I love browsing the pages of Wayfair.com for items to help me achieve that goal. I received compensation for using the products in My Organized Pantry Makeover and giving my honest feedback.
My Organized Pantry Makeover Tips and Tricks

There are several reasons why this pantry is a jumble – mainly because it is in a rental home, so I can’t tear it out and start over. Which is exactly what I would do if I owned this home. You can see below in the before images that it was chaotic, haphazard, muddled, disorderly, jumbled, unsystematic…well, disorganized!
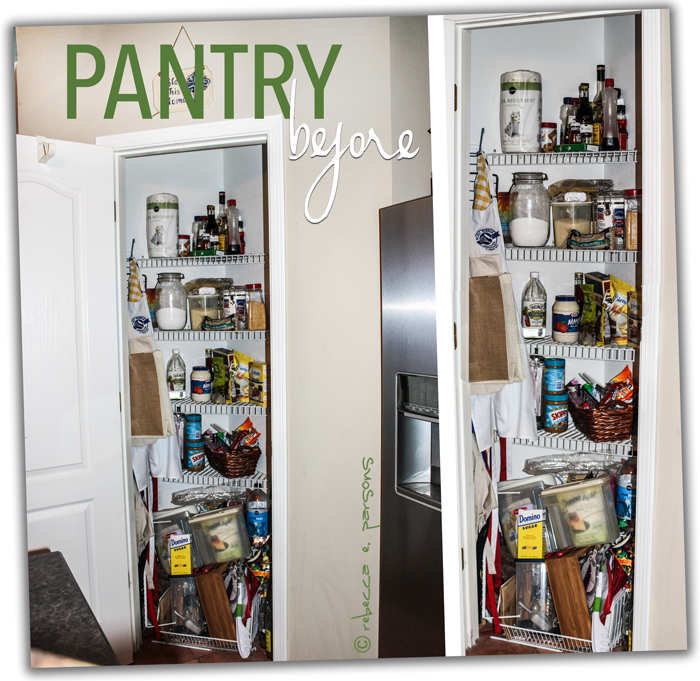
The pantry is a nice size, but who on earth would put triangular shelves in a pantry? When I was given a challenge by Wayfair.com Homemakers to makeover a closet, I jumped at the chance. Here is the story of My Organized Pantry Makeover.
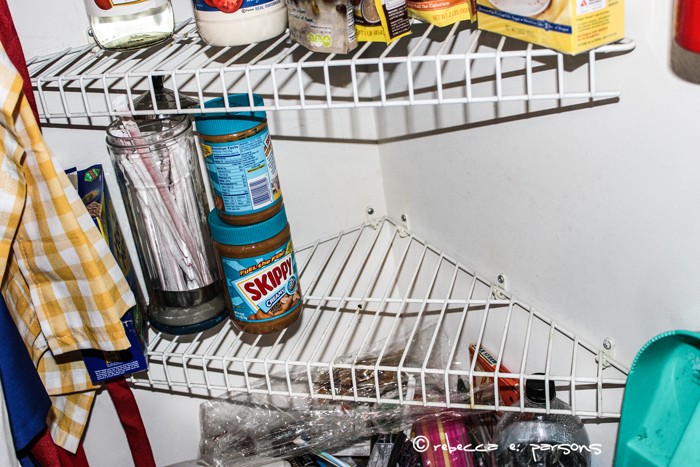
There is so much wasted space in here; and I was determined to make the best use of these silly shelves. So I emptied everything out…and I mean everything. I had every counter and part of the floor covered with stuff. The organization spilled over into the cabinets as well. Why does it always look so bad during the process?

I learned many things during this organization process! I thought I would share them with you.
Lesson 1 – Have a Plan
As soon as I saw everything laying about, I became overwhelmed. This sent me to Google and Pinterest for an extended research period. A delay tactic if I ever did such a thing {insert shame face here}. After this momentary lapse, I decided what I would put back in there. Then I went to Wayfair to see what I could find to solve this quandry! I ordered these:
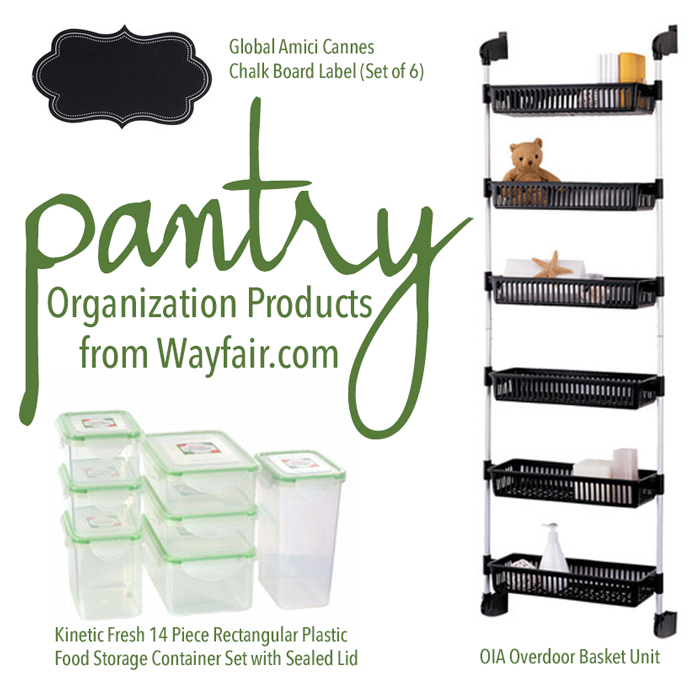
Kinetic Fresh 14 Piece Rectangular Plastic Food Storage Container Set with Sealed Lid
Global Amici Cannes Chalk Board Label (Set of 6)
As I waited for my order to be delivered, I made a plan. With great care, I thought about what I needed this kitchen pantry to do for us. How would this space work for our needs? I thought it would be best used as a dry goods storage area. I have recently been forced to eliminate gluten from my diet. That requires a whole new set of flours and grains. No more All-Purpose flour for me.
Lesson 2 – Make Use of the Door
The inside of the door was a massively underutilized space. Since the pitifully small triangle-shaped shelves left several inches of valuable space unused, I bought an over the door storage unit to hold items. The basket shelves of this OIA unit are 5″ deep and 15″ wide. This unit is sturdy – it holds all of these jars, baskets and bins easily. It just slips over the door to install. It is not flimsy and stays put. I love the quality!

Lesson 3 – Find the Right Containers
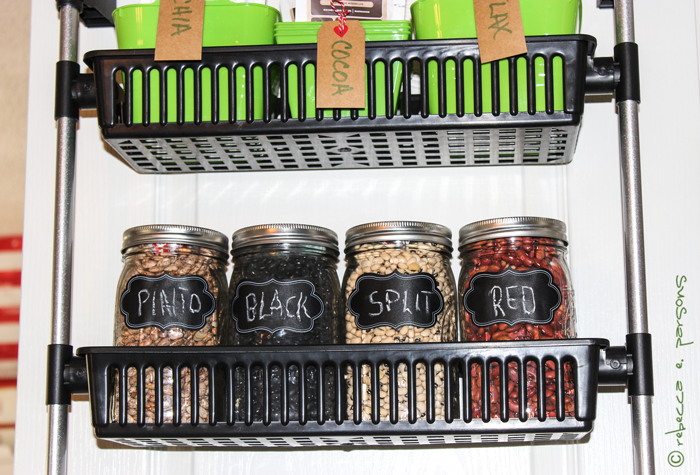
I wanted to make the best use of the space on those triangular shelves. So I ordered the 14-piece Kinetic Fresh stacking containers from Wayfair. I was not sure if they would work, so I only ordered one set. They work beautifully, so I am ordering two more sets. For now, I used what I had for the photos. What I love most is that the lids snap on every side for a tight seal. The shapes and sizes are just right for dry foods, nuts, pastas, etc. You can see them on the bottom three shelves below. I also used glass containers and Mason jars I had on hand plus repurposed some extra green plastic baskets from my craft room.

Lesson 4 – Thoughtfully Make Additions
Since the pantry is behind closed doors, it is easy to take food out and put things back without giving much thought to the order. Over time, things can become so disorganized that you forget what you have, food goes bad or expires, and you end up buying more of something you do not really need. To solve this little dilemma, I made a clipboard with a list of pantry items. When I (or HIMself) uses the last of an item, we put it on the shopping list. No excuse for wasted food when I am a No Kid Hungry advocate!
Lesson 5 – Label, Label, Label
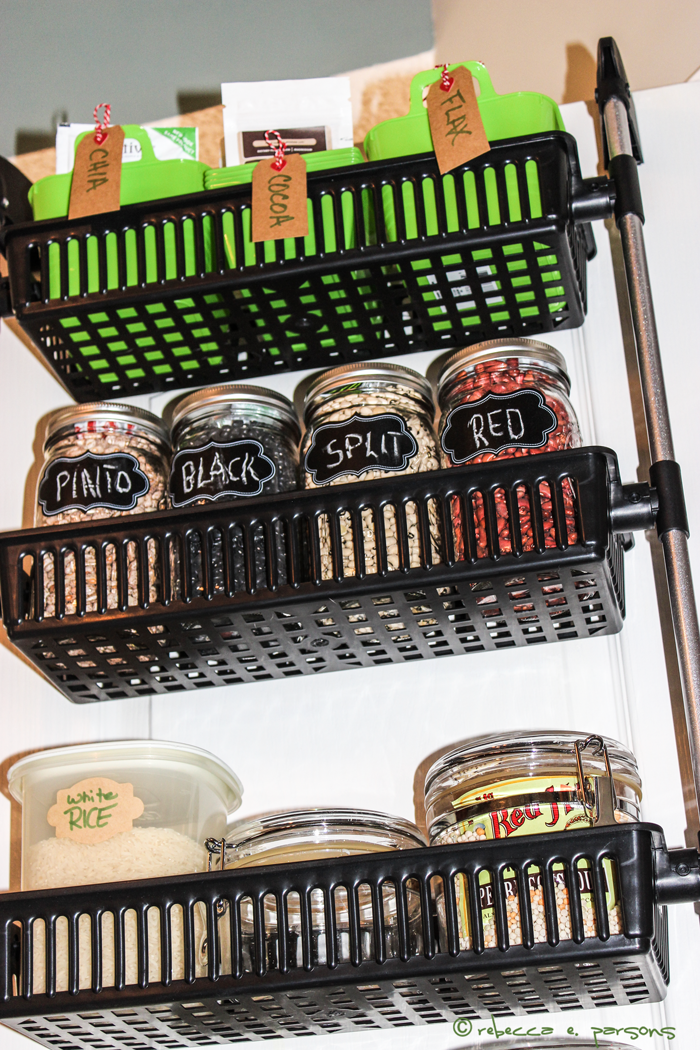
Yes, this is important as I am getting to know all these new ingredients. I bought some fancy, and pricey, labels. I needed several more to complete the task. So I created a set for my gluten-free needs. I also used tags and organic labels. I like these chalkboard labels. However, I received 8 of them instead of the 6 that were described. So that made them more affordable. They are beautiful and keep everything a cinch to locate at all times. SCORE!!!

Don’t they just make the Mason jars perfect for storage? They work well on the jars and also on the baskets and storage containers.
Lesson 6 – Get in the Zone

For an Organized Pantry Makeover, divide your pantry into zones to keep your food organized and reduce time spent searching for ingredients. First, identify categories that suit your lifestyle and use of the pantry (baking, breakfast, snacks, mixes, vinegars, syrups, etc.). Next, designate an area for each. I keep the most used items in zones within easy reach.
My Organized Pantry Makeover Process
1- Remove everything from the pantry and clean the space.
2- Lay everything out on a countertop or table, and take stock of what you actually have. This is a very messy part of the process. But it is all worth it in the end!
3- Pitch expired and/or spoiled items.
4- Organize foods into groups
- flours
- canned goods
- spices
- nuts
- packets
- boxes
- cereal
5- If you have a lot of small items like dry mixes and packets, use little baskets to keep them neat; and label so you can find them easily. The small baskets are a perfect size for those bits and pieces that tend to get lost.

6- Now decide how you are going to contain the items. Place everything in a container and label.
7- Place the filled containers on the shelves systematically according to the zones and groups you have defined.
8- Stand back and enjoy the organized pantry.
IMPORTANT HINT: To help other family members put food back in the right place, try labeling the shelves or zones. I actually gave HIMself a walk-through of where everything is so he can put things back in the proper place.
My Organized Pantry Makeover
I did not neglect the floor area either. I placed vinegars and syrups and other items in baskets on the floor.

I truly used every square inch of space that I could. Beneath the over the door unit there was empty space. I found this little three shelf rolling cart that fits perfectly tucked into that space. I can roll it out of the way when I want something on the shelves behind it. I also put the snack stuff there, so we can grab it in a hurry.

Just one last thing…those pesky triangle shelves are now holding a massive amount of food. I never thought it would happen when I began this process. A little thought and the right system can work wonders even in the tiniest of pantries.

Ohhhh WOW! I smile with satisfied joy every time I open My Organized Pantry now. The colors, the labels, the zones…all make me happy! Might I have too many aprons?


I have to rearrange and clean up my pantry this weekend! It is about time and I have some new ideas for it too! Thanks for the post! I think that the makeover is really nice! Thanks for sharing! Greets!
Great job! Your pantry looks very nice! Mine is a mess and this weekend I am planning on rearrange and organize it! Thanks for the post! Best regards, Storage Feltham Ltd.