I am decorating a new home!!! I was browsing for some creative inspiration and ended up on book art artist Lisa Occhipinti website. I was head over heels inspired by her Sea Anemones. As my creativity kicked into high gear, these DIY flowers emerged. I used the pages of an old textbook for this art project. (I would never destroy a book of great value.)

Decorative art is one of my skills. I used to do that for a living. I painted murals, stenciled and did faux finishes around the world until I broke my back and had to come down from the ladder for good. I transitioned those skills and talents to canvas and teach others to do that also. I always try to look at the positive side of life and have reinvented myself more than once. 🙂
#SwingIntoSpring
I am joining the Swing Into Spring Blog Hop…At the Picket Fence.

I know you want to know how to make these babies. They take some patience, but they are well worth the effort.
DIY Paper Art Flowers
Materials Needed
- Old book – I used a textbook (for smaller flowers us a paperback)
- Craft knife with new blade
- Clamp
- Metal ruler
- Cardstock – 1 sheet
- Scissors
- White glue
- Acrylic paint – I used aqua, bright yellow and coral
- Artist brush – I used a 1′ flat
- Sticks from my yard
- Duct tape torn into small 2″ X 1/2″ pieces
- Prepared canvas
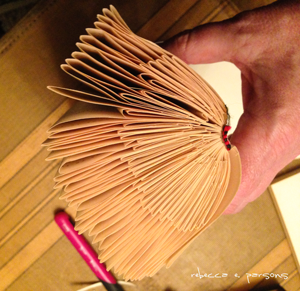
The first challenge is to fold ALL the pages of the book. I had HIMself do this part. Once all pages were folded in half, I had him fold ever other page in half again. The makes alternate tall and short folds which will become your petals. Don’t worry if they are not exactly even. Nothing is nature is even! I shared the complete step-by-step process on the Mom It Forward blog last week. But fiish here before you toddle over there. I will pout if you leave!
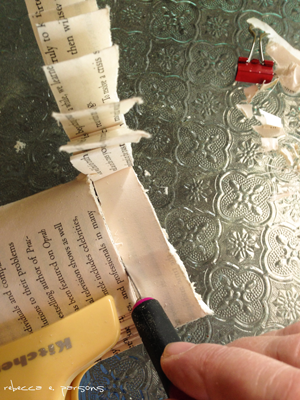
The second challenge is to slice the flowers from the book, one at a time. This take a lot of patience. I tried my beloved Ryobi reciprocating saw at first. Now I didn’t have my workbench and vise set up. I just moved and could not unearth is in the garage (sheepish grin). Yes, I have some hoarding issues. Bu that’s another story. The smaller flower was made with this method. I love the ruffely edges and will do this again with the vise. 🙂
I had ti use a craft knife and ruler, cutting the folded pages from the spine to the edges. I cut 1/4″ sections. Designer Tip: Do not force the knife through the pages. It takes patience to cut through the stack. Just keep swiping the same area with your knife until cut all the way through. Allow the knife to do the work! Designer Hint: I kept raising the cut pieces away from what I was cutting so I could see better and have more control. This step is best done in a well-ventilated area.
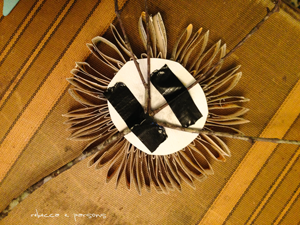
Once you have separated a section from the book, spread it out in a circle with ends touching. Let them rest in this position as you cut 3″ circles from cardstock with scissors. The circles will hold the flower together.
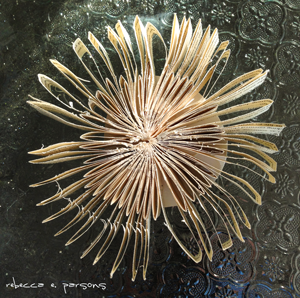
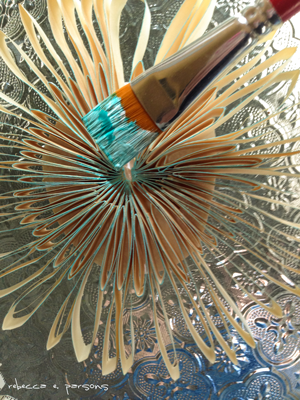
These look pretty cool as they are. The yellowed pages of my book make them look tea stained. I wanted to create an art piece for my new home in my palette of aqua, yellow and coral. So I painted the flowers with acrylic craft paint. I used the paint diluted with a little water, but you can use it straight from the bottle. I just lightly brushed the petals until I achieved the look I wanted.
I attached some sticks from my yard to the back of the cardstock with duct tape. Genius, I know!!! This created my little flower.
Here is the artwork in place. I love it and it does brings a touch of spring into my home! I would love to see some of your flowers made with this technique. Please share your pictures below! And I would not mind if you Pinned these either.


Leave a Reply